
File size: 58,139 Bytes
fb83c5b |
1 2 3 4 5 6 7 8 9 10 11 12 13 14 15 16 17 18 19 20 21 22 23 24 25 26 27 28 29 30 31 32 33 34 35 36 37 38 39 40 41 42 43 44 45 46 47 48 49 50 51 52 53 54 55 56 57 58 59 60 61 62 63 64 65 66 67 68 69 70 71 72 73 74 75 76 77 78 79 80 81 82 83 84 85 86 87 88 89 90 91 92 93 94 95 96 97 98 99 100 101 102 103 104 105 106 107 108 109 110 111 112 113 114 115 116 117 118 119 120 121 122 123 124 125 126 127 128 129 130 131 132 133 134 135 136 137 138 139 140 141 142 143 144 145 146 147 148 149 150 151 152 153 154 155 156 157 158 159 160 161 162 163 164 165 166 167 168 169 170 171 172 173 174 175 176 177 178 179 180 181 182 183 184 185 186 187 188 189 190 191 192 193 194 195 196 197 198 199 200 201 202 203 204 205 206 207 208 209 210 211 212 213 214 215 216 217 218 219 220 221 222 223 224 225 226 227 228 229 230 231 232 233 234 235 236 237 238 239 240 241 242 243 244 245 246 247 248 249 250 251 252 253 254 255 256 257 258 259 260 261 262 263 264 265 266 267 268 269 270 271 272 273 274 275 276 277 278 279 280 281 282 283 284 285 286 287 288 289 290 291 292 293 294 295 296 297 298 299 300 301 302 303 304 305 306 307 308 309 310 311 312 313 314 315 316 317 318 319 320 321 322 323 324 325 326 327 328 329 330 331 332 333 334 335 336 337 338 339 340 341 342 343 344 345 346 347 348 349 350 351 352 353 354 355 356 357 358 359 360 361 362 363 364 365 366 367 368 369 370 371 372 373 374 375 376 377 378 379 380 381 382 383 384 385 386 387 388 389 390 391 392 393 394 395 396 397 398 399 400 401 402 403 404 405 406 407 408 409 410 411 412 413 414 415 416 417 418 419 420 421 422 423 424 425 426 427 428 429 430 431 432 433 434 435 436 437 438 439 440 441 442 443 444 445 446 447 448 449 450 451 452 453 454 455 456 457 458 459 460 461 462 463 464 465 466 467 468 469 470 471 472 473 474 475 476 477 478 479 480 481 482 483 484 485 486 487 488 489 490 491 492 493 494 495 496 497 498 499 500 501 502 503 504 505 506 507 508 509 510 511 512 513 514 515 516 517 518 519 520 521 522 523 524 525 526 527 528 529 530 531 532 533 534 535 536 537 538 539 540 541 542 543 544 545 546 547 548 549 550 551 552 553 554 555 556 557 558 559 560 561 562 563 564 565 566 567 568 569 570 571 572 573 574 575 576 577 578 579 580 581 582 583 584 585 586 587 588 589 590 591 592 593 594 595 596 597 598 599 600 601 602 603 604 605 606 607 608 609 610 611 612 613 614 615 616 617 618 619 620 621 622 623 624 625 626 627 628 629 630 631 632 633 634 635 636 637 638 639 640 641 642 643 644 645 646 647 648 649 650 651 652 653 654 655 656 657 658 659 660 661 662 663 664 665 666 667 668 669 670 671 672 673 674 675 676 677 678 679 680 681 682 683 684 685 686 687 688 689 690 691 692 693 694 695 696 697 698 699 700 701 702 703 704 705 706 707 708 709 710 711 712 713 714 715 716 717 718 719 720 721 722 723 724 725 726 727 728 729 730 731 732 733 734 735 736 737 738 739 740 741 742 743 744 745 746 747 748 749 750 751 752 753 754 755 756 757 758 759 760 761 762 763 764 765 766 767 768 769 770 771 772 773 774 775 776 777 778 779 780 781 782 783 784 785 786 787 788 789 790 791 792 793 794 795 796 797 798 799 800 801 802 803 804 805 806 807 808 809 810 811 812 813 814 815 816 817 818 819 820 821 822 823 824 825 826 827 828 829 830 831 832 833 834 835 836 837 838 839 840 841 842 843 844 845 846 847 848 849 850 851 852 853 854 855 856 857 858 859 860 861 862 863 864 865 866 867 868 869 870 871 872 873 874 875 876 877 878 879 880 881 882 883 884 885 886 887 888 889 890 891 892 893 894 895 896 897 898 899 900 901 902 903 904 905 906 907 908 909 910 911 912 913 914 915 916 917 918 919 920 921 922 923 924 925 926 927 928 929 930 931 932 933 934 935 936 937 938 939 940 941 942 943 944 945 946 947 948 949 950 951 952 953 954 955 956 957 958 959 960 961 962 963 964 965 966 967 968 969 970 971 972 973 974 975 976 977 978 979 980 981 982 983 984 985 986 987 988 989 990 991 992 993 994 995 996 997 998 999 1000 1001 1002 1003 1004 1005 1006 1007 1008 |
> **Note:** This document is under revision, and some errors may persist. Please refer to the latest version for accurate information.
# Training, Common Section
This document facilitates training with models such as DreamBooth and LoRA, including [XTI:P+](https://github.com/kohya-ss/sd-scripts/pull/327). It details how to prepare training data and outlines common options.
# Overview
For environment setup, please refer to the README of this repository. The document covers the following topics:
1. Preparation of training data (new format using configuration files)
2. Simplified explanation of terms used in training
3. Previous specification format (specify without using configuration files)
4. Sample image generation during training
5. Common options used in each script
6. Preparation of metadata for fine tuning: captioning, etc.
Start training by following the initial steps; further details are available in each script's documentation.
# Training Data Preparation
Prepare your training data in any designated folder(s). Supported formats include `.png`, `.jpg`, `.jpeg`, `.webp`, `.bmp`. Generally, preprocessing such as resizing is not required.
However, using images larger than the training resolution or upscaling them with super-resolution AI beforehand is recommended. Additionally, it's advisable to resize overly large images (around 3000x3000 pixels?) to prevent errors.
When organizing your image data for training, you can specify the training data in various ways depending on the number of data sets, the learning targets, captions (image descriptions), etc. The methods available (specific to this repository) are described below. The usage of regularization images will be discussed later.
1. **DreamBooth, Class+Identifier Method (regularization images available):**
Learn from images associated with a specific identifier without needing captions. This method is convenient for learning a specific character but associates the character's hairstyle, clothing, and background with the identifier, potentially causing the model to generate images without changing the clothing when generating the prompt.
2. **DreamBooth, Captioning Method (regularization images available):**
Prepare a text file with captions for each image. If you aim to learn a specific character, detailed descriptions in the captions can help differentiate the character from other elements, enabling the model to learn the character more precisely.
3. **Fine Tuning Method (regularization images not available):**
Pre-prepare captions in a metadata file. Tags and captions can be managed separately, and caching latents can speed up learning. This method is broadly referred to as fine tuning but has various applications.
The following table illustrates the combinations of targets to be learned or methods of use:
| Target or Method | Script | DB / Class+Identifier | DB / Caption | Fine Tuning |
|----------------------------------|-----------------------------|-----------------------|--------------|-------------|
| Model Fine Tuning | `fine_tune.py` | x | x | o |
| Model DreamBooth | `train_db.py` | o | o | x |
| LoRA | `train_network.py` | o | o | o |
| Textual Inversion | `train_textual_inversion.py`| o | o | o |
## Method Selection Guide
For those considering LoRA or Textual Inversion methods and who prefer not to prepare a caption file, the DreamBooth class+identifier method is recommended. However, if preparing a caption file is feasible, the DreamBooth captioning method may be more effective. Additionally, if you possess a substantial volume of training data and wish to incorporate regularization images, the fine tuning method should also be considered.
Note: The fine tuning method is not applicable for DreamBooth alone.
## Configuration Guidelines
Below are the general guidelines for configuring each method. For detailed configuration instructions, please refer to [Dataset Settings](./config_README-ja.md).
# DreamBooth, Class+Identifier Method (Regularization Images Available)
This method involves training each image with a caption formatted as `class identifier` (e.g., `shs dog`).
## Step 1. Determine Identifier and Class
Choose a unique identifier for recognizing and learning the target, and determine the class the target belongs to.
Here is a simple explanation (for further details, please conduct your own research):
- **Class**: This refers to the broad category of the learning target. For instance, to learn about a specific dog breed, the class would be "dog." For anime characters, appropriate classes might be "boy" or "girl," "1boy," "1girl," etc., based on the model.
- **Identifier**: This is a specific term used to identify and learn about the target. Any term can be used, but following the original paper's recommendations, a "rare word that can be tokenized into a single token with a maximum length of three characters" is suggested.
Using both an identifier and a class (e.g., `shs dog`) allows for precise target recognition and learning.
When generating images post-training, images of the learned dog breed can be produced by specifying `shs dog`.
(Reference: Recent identifiers I've used include `shs`, `sts`, `scs`, `cpc`, `coc`, `cic`, `msm`, `usu`, `ici`, `lvl`, `cic`, `dii`, `muk`, `ori`, `hru`, `rik`, `koo`, `yos`, `wny`. Ideally, select identifiers not listed in Danbooru Tags.)
## Step 2. Decide Whether to Use Regularization Images and Generate Them if Necessary
Regularization images help prevent the model from biasing too heavily towards a single learning target, a phenomenon known as "language drift". For instance, training a specific character with the prompt `shs 1girl` without regularization images might cause the model to generate images that are too similar to the generic `1girl` class, even if `1girl` appears in the training caption.
Using regularization images alongside the target image ensures that the class remains broadly defined, while the identifier is specifically learned only when added to the prompt.
If the objective is to have a specific character appear distinctively, regularization images are essential.
Textual Inversion is not recommended here, as it requires the token string to be included in the caption to learn anything effectively.
Typically, regularization images are generated using only the class name (e.g., `1girl`) from the learning target model. If the quality of these generated images is subpar, consider adjusting the prompt or using downloaded images from the internet.
Note: The quality of regularization images can influence the model, so choose carefully.
It is generally advised to prepare around 100 images to ensure enough diversity to generalize the class images and effectively learn their characteristics.
For generated images, it's best to match the size of the training resolution, or more specifically, the resolution of the bucket (to be discussed later).
## Step 2. Write the Configuration File
Create a text file and change the extension to `.toml`. Example configuration:
(Note: Lines starting with `#` are comments and can be copied as-is or omitted if preferred.)
```toml
[general]
enable_bucket = true # Whether to use Aspect Ratio Bucketing
[[datasets]]
resolution = 512 # Training resolution
batch_size = 4 # Batch size
[[datasets.subsets]]
image_dir = 'C:\\hoge' # Specify the folder for learning target images
class_tokens = 'hoge girl' # Specify the identifier class
num_repeats = 10 # Number of repetitions for the learning target image
# Include the following only if using regularization images
[[datasets.subsets]]
is_reg = true
image_dir = 'C:\\reg' # Specify the folder for regularization images
class_tokens = 'girl' # Specify the class for regularization
num_repeats = 1 # Number of repetitions for regularization images, typically 1 is sufficient
```
# Training Configuration Details
When setting up your training environment, consider the following parameters to optimize your model's learning effectiveness.
## 1. Training Resolution
Specify the resolution at which the training images should be processed. Use a single number for square images (e.g., `512` produces a 512x512 image). For rectangular images, provide two numbers separated by a comma (e.g., `[512,768]` for 512x768). Standard resolutions for SD1.x models are typically 512 pixels, whereas SD2.x models are often trained at 768 pixels.
## 2. Batch Size
This parameter defines the number of data instances processed simultaneously during training. It should be adjusted based on the GPU VRAM capacity and the desired training resolution. Further guidance is provided in later sections.
## 3. Folder Specification
Identify the directory containing the target images for learning and, if applicable, regularization images. This should be the direct path to the folder holding the actual image files.
## 4. Identifier and Class
Specify these as detailed in the previous guidelines.
## 5. Number of Repetitions
For a comprehensive understanding of how many times the training images should be repeated, see the detailed explanation below.
### About Repetitions
The number of repetitions helps synchronize the count of regularization images with the number of target images for learning. Typically, there are more regularization images than target images, so the target images are repeated to maintain a 1:1 ratio.
Configure the number of repetitions as follows: "__Number of target image repetitions * Number of target images ≥ Number of regularization image repetitions * Number of regularization images__".
(The total data count for one epoch—when the data cycles through once—is "Number of target image repetitions * Number of target images". If there are more regularization images than this total, the surplus will not be utilized.)
## Step 3. Training Execution
Consult the specific documentation related to your training setup for detailed instructions.
# DreamBooth, Captioning Method (Regularization Images Available)
In this approach, each image is learned with an associated caption, facilitating more nuanced understanding and generation of visual content.
## step 1. Prepare the caption file
Place a file with the same name as the image in the folder where the learning image is placed, with the extension `.caption` (which can be changed in the settings). Each file should contain only one line. The encoding is `UTF-8`.
## step 2. Decide whether to use regularization images and generate them if necessary
Same as class+identifier. You can also add captions to regularization images, but it is usually not necessary.
## step 2. Write the configuration file
Create a text file and change the extension to `.toml`. For example, write as follows.
```toml
[general]
enable_bucket = true # Whether to use Aspect Ratio Bucketing
[[datasets]]
resolution = 512 # Training resolution
batch_size = 4 # Batch size
[[datasets.subsets]]
image_dir = 'C:\hoge' # Specify the folder where the learning target images are placed
caption_extension = '.caption' # Specify the extension of the caption file. If you want to use .txt, change it
num_repeats = 10 # Number of times to repeat the learning target image
# Write the following only if you are using regularization images
[[datasets.subsets]]
is_reg = true
image_dir = 'C:\reg' # Specify the folder where the regularization images are placed
class_tokens = 'girl' # Specify the class
num_repeats = 1 # Number of times to repeat the regularization image, usually 1 is enough
```
Basically, you can change the following only.
1. Training resolution
1. Batch size
1. Folder specification
1. Caption file extension
You can specify any extension.
1. Number of repetitions
## step 3. Training
Please refer to each document for training.
## step 3. Training
Please refer to each document for training.
# fine tuning method
## step 1. Prepare the metadata
The file that collects captions and tags is called metadata. It is in json format with the extension `.json`. The method of creating it is too long to write here, so it is written at the end of this document.
## step 2. Write the configuration file
Create a text file and change the extension to `.toml`. For example, write as follows.
```toml
[general]
shuffle_caption = true
keep_tokens = 1
[[datasets]]
resolution = 512 # Training resolution
batch_size = 4 # Batch size
[[datasets.subsets]]
image_dir = 'C:\piyo' # Specify the folder where the learning target images are placed
metadata_file = 'C:\piyo\piyo_md.json' # Metadata file name
```
Basically, you can change the following only. Placeholders are the same as DreamBooth, class+identifier.
1. Training resolution
1. Batch size
1. Folder specification
1. Metadata file name
Specify the metadata file created according to the method above.
## step 3. Training
Please refer to each document for training.
# Explanation of terms used in training
I've omitted the details and I'm not fully understanding it myself, so please do your own research.
## fine tuning
This refers to training the model and fine-tuning it. The meaning varies depending on how it's used, but in the context of Stable Diffusion, it means training the model with images and captions. DreamBooth is one of the special ways of fine tuning. Broadly speaking, fine tuning includes training the model with LoRA, Textual Inversion, Hypernetworks, etc.
## Step
In a nutshell, 1 step is calculated with 1 piece of learning data. "Feed the caption of the learning data to the current model and see what image comes out. Compare the image with the learning data's image and make the model slightly change to get closer to the learning data." is 1 step.
## Batch size
The batch size is a value that specifies how many pieces of data to calculate together in 1 step. By calculating together, the speed is relatively improved. Also, it is generally said that the accuracy is also improved.
`Batch size × number of steps` is the number of data used for training. Therefore, if you increase the batch size, you should also reduce the number of steps.
(However, for example, "batch size 1 with 1600 steps" and "batch size 4 with 400 steps" do not necessarily result in the same outcome. If the same learning rate is used, it is generally the latter that is underfed. Try to increase the learning rate (for example, `2e-6`) or reduce the number of steps (for example, 500 steps) to compensate for this.)
Increasing the batch size will consume more GPU memory. If the memory is insufficient, an error will occur. If the error does not occur, the learning speed will be slowed down. You can use the task manager or `nvidia-smi` command to check the memory usage and adjust accordingly.
Also, note that a batch is a unit of "a batch of data".
## Learning Rate
In a nutshell, it refers to how much to change each step. If you specify a large value, it will progressively learn faster, but if it changes too much, the model may be damaged or may not reach the optimal state. If you specify a small value, the learning speed will be slower, and it may not reach the optimal state.
The learning rate differs greatly depending on the method used, including fine tuning, DreamBooth, and LoRA, and also depends on the learning data, the model to be trained, the batch size, and the number of steps. It is recommended to start with a general value and adjust it according to the learning state.
By default, the learning rate is fixed throughout the entire learning. The scheduler determines how the learning rate changes, so the results can vary depending on the scheduler.
## Epoch
When the learning data is learned once (the data is cycled once), it is considered 1 epoch. If the number of repetitions is specified, it is considered 1 epoch after the repetition.
The number of steps per epoch is generally `number of dataÅbatch size`, but it increases slightly with Aspect Ratio Bucketing (since different buckets of data cannot be in the same batch, the number of steps increases).
## Aspect Ratio Bucketing
Stable Diffusion v1 is trained at 512*512, but it also learns at 256*1024 and 384*640, etc., which reduces the amount of trimming and expects to learn more accurately about the relationship between captions and images.
This allows learning at any resolution, so you don't need to pre-uniform the aspect ratio of the image data.
It can be enabled or disabled by the settings, and in the examples of this document, it is enabled (`true` is set).
The learning resolution is created by adjusting the resolution in the parameters to be less than or equal to the area of the memory used by the parameters (default, changeable), and is created in multiples of 64 pixels.
In machine learning, it is common to standardize the input size, but there is no specific constraint, and in fact, as long as the same batch is uniformly sized, it is okay. NovelAI's bucketing seems to refer to classifying the teacher data according to the learning resolution according to the aspect ratio, and then creating a batch with each bucket's images to standardize the image size of the batch.
# Previous Specification Method (Without Using the Configuration File and Specifying Through the Command Line)
The method of specifying without using the `.toml` file and specifying through the command line option. There are three methods: DreamBooth class+identifier, DreamBooth captioning, and fine tuning.
## DreamBooth, class+identifier Method
You specify the number of repetitions by the folder name, and also use the `train_data_dir` and `reg_data_dir` options.
### step 1. Prepare the Learning Image
Create a folder to store the learning images. __Inside the folder, create a directory with the following name.__
```
<Number of repetitions>_<identifier> <class>
```
Don't forget the `_` in between.
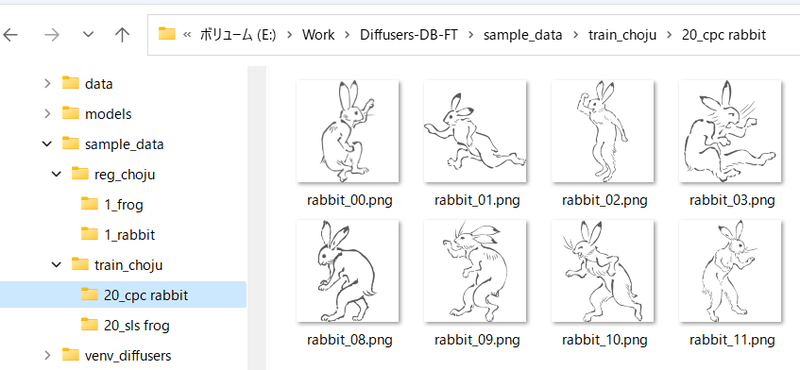
For example, if you specify the prompt "sls frog" and repeat the data 20 times, it will be named "20_sls frog". It will look like this:
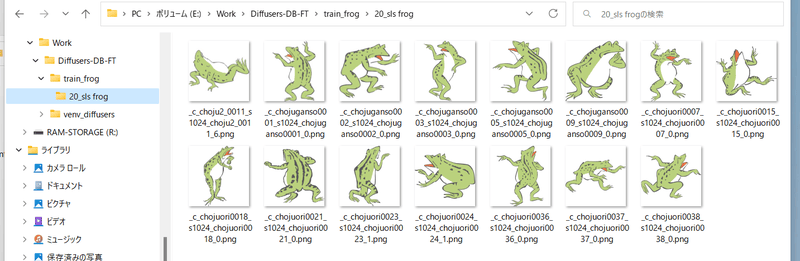
### Training with multiple classes and multiple targets (identifiers)
The method is simple. Prepare a folder for learning images, and create a directory with the name ``<Number of repetitions>_<identifier> <class>`` inside the folder.
For example, if you want to learn both "sls frog" and "cpc rabbit" at the same time, it will look like this:
If there is only one class but multiple targets, you only need one regularization image folder. For example, if there are characters A and B in 1girl, it will look like this:
- train_girls
- 10_sls 1girl
- 10_cpc 1girl
- reg_girls
- 1_1girl
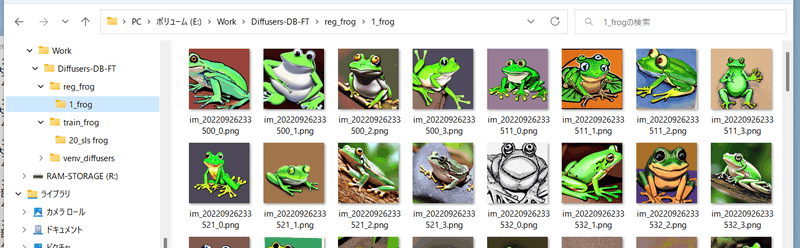
### step 2. Prepare regularization images
The steps to use regularization images.
Create a folder to store the regularization images. __Inside the folder, create a directory with the name__ ``<Number of repetitions>_<class>``.
For example, if you specify the prompt "frog" and do not repeat the data (1 time only), it will look like this:
### step 3. Execute training
Execute each training script. Specify the folder for learning data with the `--train_data_dir` option (__not the folder containing the images, but the parent folder__), and specify the regularization image folder with the `--reg_data_dir` option (__not the folder containing the images, but the parent folder__).
## DreamBooth, captioning method
If you put a file with the same name as the image but with the extension .caption (optionally changeable) in the learning image and regularization image folders, it will learn the caption from the file as the prompt.
※The folder name (identifier class) will no longer be used for the learning of those images.
The default extension for the caption file is .caption. You can change it with the `--caption_extension` option in the training script. The `--shuffle_caption` option shuffles each part of the caption when learning, separated by commas.
## fine tuning method
The preparation of metadata is the same as when using a configuration file. Specify the metadata file with the `in_json` option.
# Sample output during training
You can check the progress of learning by generating images with the model being trained. Specify the following options in the training script.
- `--sample_every_n_steps` / `--sample_every_n_epochs`
Specify the number of steps or epochs to output a sample. Output a sample every time this number is reached. The epoch number takes precedence if both are specified.
- `--sample_at_first`
Output a sample before learning starts. You can compare before and after learning.
- `--sample_prompts`
Specify the file containing the prompts for sample output.
- `--sample_sampler`
Specify the sampler to use for sample output.
`'ddim', 'pndm', 'heun', 'dpmsolver', 'dpmsolver++', 'dpmsingle', 'k_lms', 'k_euler', 'k_euler_a', 'k_dpm_2', 'k_dpm_2_a'` can be selected.
You need to prepare a text file with the prompts for sample output in advance. Write one prompt per line.
For example:
```txt
# prompt 1
masterpiece, best quality, 1girl, in white shirts, upper body, looking at viewer, simple background --n low quality, worst quality, bad anatomy,bad composition, poor, low effort --w 768 --h 768 --d 1 --l 7.5 --s 28
# prompt 2
masterpiece, best quality, 1boy, in business suit, standing at street, looking back --n low quality, worst quality, bad anatomy,bad composition, poor, low effort --w 576 --h 832 --d 2 --l 5.5 --s 40
```
Lines starting with `#` are comments. You can specify options for the generated image with `--` followed by a lowercase English letter. The following options are available:
- `--n` The following options are treated as negative prompts.
- `--w` Specify the width of the generated image.
- `--h` Specify the height of the generated image.
- `--d` Specify the seed for the generated image.
- `--l` Specify the CFG scale for the generated image.
- `--s` Specify the number of steps for the generation.
# Common options used by each script
If the script has been updated but the documentation has not been updated, please check the available options using the `--help` option.
## Specifying the model to be used for training
- `--v2` / `--v_parameterization`
If you want to use Hugging Face's stable-diffusion-2-base or a fine-tuned model based on it (models that instruct you to use `v2-inference.yaml`), specify the `--v2` option. If you want to use stable-diffusion-2, 768-v-ema.ckpt, or any fine-tuned models that instruct you to use `v2-inference-v.yaml`, specify both the `--v2` and `--v_parameterization` options.
In Stable Diffusion 2.0, the following points have changed significantly:
1. The Tokenizer used
2. The Text Encoder used and the output layer used (Stable Diffusion 2.0 uses the second-to-last layer)
3. The output dimension of the Text Encoder (768->1024)
4. The structure of the U-Net (the number of heads in CrossAttention, etc.)
5. v-parameterization (the sampling method has changed, according to what I've seen)
Of these, 1-4 are used in the base, and 1-5 are used in the non-base (768-v). The `--v2` option enables 1-4, and the `--v_parameterization` option enables 5.
- `--pretrained_model_name_or_path`
Specify the model to be used as the starting point for additional training. You can specify a Stable Diffusion checkpoint file (.ckpt or .safetensors), a local directory of a Diffusers model, or a Diffusers model ID ("stabilityai/stable-diffusion-2", etc.).
## Training settings
- `--output_dir`
Specify the folder to save the model after training.
- `--output_name`
Specify the model file name without the extension.
- `--dataset_config`
Specify the `.toml` file that describes the dataset configuration.
- `--max_train_steps` / `--max_train_epochs`
Specify the number of steps or epochs to train. If both are specified, the number of epochs is prioritized.
- `--mixed_precision`
Train with mixed precision (mixed precision) to save memory. Specify as `--mixed_precision="fp16"`. The accuracy may be lower than without mixed precision, but the amount of GPU memory required for training is reduced.
(RTX30 series and later can also specify `bf16`. Please match the settings you made when setting up the environment with accelerate).
- `--gradient_checkpointing`
Calculate the weights in a piecemeal manner instead of all at once to reduce the amount of GPU memory required for training. It does not affect the accuracy, but it can make the batch size larger, so it may affect the overall training time.
In addition, it is generally slower than on, but it can make the batch size larger, so the total training time may be faster.
- `--xformers` / `--mem_eff_attn`
If you specify the xformers option, xformers' CrossAttention is used. If you do not have xformers installed or encounter an error (depending on the environment, such as `mixed_precision="no"`), you can specify the `mem_eff_attn` option to use the memory-efficient version of CrossAttention (which is slower than xformers).
- `--clip_skip`
Specify `2` to use the second-to-last layer's output after the Text Encoder (CLIP). Specify `1` or omit the option to use the last layer.
※SD2.0 is set to use the second-to-last layer by default, so do not specify it when training SD2.0.
If the model was trained to use the second layer, specify `2`.
If the model was trained to use the last layer, the model is trained assuming the last layer. Therefore, re-training with the second layer may require a certain number of teacher data, and a long training time.
- `--max_token_length`
The default is `75`. Specify `150` or `225` to extend the token length for training. Specify it when training with long captions.
However, the token extension specification during training is slightly different from the Web UI of Automatic1111 (such as the specification of splitting), so it is recommended to learn with `75`.
Like clip_skip, to learn with a different length than the model's learning state, you may need a certain number of teacher data and a long training time.
- `--weighted_captions`
Specify to enable weighted captions similar to Automatic1111's Web UI. Can be used for training except for "Textual Inversion and XTI". Can also be used for DreamBooth token strings.
The notation for weighted captions is almost the same as the Web UI, and (abc), [abc], (abc:1.23), etc. can be used. Nesting is also possible. If you include a comma within the parentheses, the shuffle/dropout of the prompt will be incorrect, so do not include a comma within the parentheses.
- `--persistent_data_loader_workers`
If you specify it on a Windows environment, the waiting time between epochs is significantly shortened.
- `--max_data_loader_n_workers`
Specify the number of processes for data loading. The more processes, the faster the data loading and the GPU is used more efficiently, but it consumes main memory. The default is "`8` or `CPU concurrent thread number - 1`, whichever is smaller", so if there is no spare main memory or the GPU usage is about 90%, please reduce the number of processes to `2` or `1`.
- `--logging_dir` / `--log_prefix`
Options for saving training logs. Specify the folder to save the log with the logging_dir option. TensorBoard-formatted logs are saved.
For example, specify `--logging_dir=logs`, and a logs folder will be created in the working directory, and the log will be saved in the date-named folder within it.
Also, if you specify the `--log_prefix` option, the specified string will be added before the date. Use it to identify, such as `--logging_dir=logs --log_prefix=db_style1_`.
To check the log with TensorBoard, open another command prompt, and enter the following in the working directory.
```
tensorboard --logdir=logs
```
(I think tensorboard is installed together with the environment setup, but if it is not installed, please install it with `pip install tensorboard`.)
After that, open the browser and access <http://localhost:6006/> to display it.
- `--log_with` / `--log_tracker_name`
Options for saving training logs. You can save logs to `tensorboard` and `wandb`. For details, please refer to [PR#428](https://github.com/kohya-ss/sd-scripts/pull/428).
- `--noise_offset`
This implementation is based on the following article: <https://www.crosslabs.org//blog/diffusion-with-offset-noise>
It seems that overall, the results of generating dark and bright images are improved. It may be effective in LoRA training. It is recommended to specify a value of `0.1` or less.
- `--adaptive_noise_scale` (Experimental option)
This option automatically adjusts the noise offset value according to the absolute value of the mean of the latents. It is enabled when `--noise_offset` is specified. The noise offset value is calculated as `noise_offset + abs(mean(latents, dim=(2,3))) * adaptive_noise_scale`. Latents are assumed to be close to a normal distribution, so it is recommended to specify a value of `noise_offset` of 1/10~ the same or less.
Negative values can also be specified, in which case the noise offset is clipped to be 0 or above.
- `--multires_noise_iterations` / `--multires_noise_discount`
Settings for multi-resolution noise (pyramid noise). For details, please refer to [PR#471](https://github.com/kohya-ss/sd-scripts/pull/471) and the following page [Multi-Resolution Noise for Diffusion Model Training](https://wandb.ai/johnowhitaker/multires_noise/reports/Multi-Resolution-Noise-for-Diffusion-Model-Training--VmlldzozNjYyOTU2).
Specify a number value to enable. A value of 6~10 is recommended. Specify a value of `--multires_noise_discount` of 0.1~0.3 (recommended by the author of PR#471 for datasets with a smaller number of samples) or 0.8 (recommended by the author of the original article) (default is 0.3).
- `--debug_dataset`
With this option, you can check which images and captions are used for training before starting the training. Press `Esc` to exit and return to the command line. Press `S` to go to the next step (batch) and `E` to go to the next epoch.
※Images are not displayed in Linux environments (including Colab).
- `--vae`
Specify either a Stable Diffusion checkpoint, a VAE checkpoint file, a Diffusers model, or a VAE (both local or Hugging Face model IDs) to use that VAE for training (when caching latents or retrieving latents during training).
In DreamBooth and fine tuning, the saved model will include this VAE.
- `--cache_latents` / `--cache_latents_to_disk`
Cache the output of the VAE to the main memory to reduce VRAM usage. Augmentations other than `flip_aug` are disabled. The overall training speed is also slightly faster.
Specify `--cache_latents_to_disk` to save the cache to disk. The cache will be effective even if the script is exited and restarted.
- `--min_snr_gamma`
Specify the Min-SNR Weighting strategy. For details, please refer to [this link](https://github.com/kohya-ss/sd-scripts/pull/308). The paper recommends `5`.
## Model Saving Settings
- `--save_precision`
Specify the data precision to save. If you specify float, fp16, or bf16, the model will be saved in that format (DreamBooth and fine tuning will not be saved in Diffusers format). This is useful for reducing model size, for example.
- `--save_every_n_epochs` / `--save_state` / `--resume`
If you specify a number for save_every_n_epochs, the model will be saved every n epochs during training.
If you specify save_state at the same time, the optimizer, etc. will also be saved together with the training state (you can resume training from the saved state). This is expected to improve accuracy and shorten training time. The save destination is a folder.
The training state is output to a folder named `<output_name>-??????-state` (?????? is the epoch number) in the save destination folder. Use it for long-term training.
To resume training from a saved state, specify resume and the state folder (not `output_dir` but the state folder inside it).
Note that due to the specifications of Accelerator, the epoch number, global step are not saved and will be reset to 1 when resumed.
- `--save_every_n_steps`
If you specify a number for save_every_n_steps, the model will be saved every n steps during training. You can specify it at the same time as save_every_n_epochs.
- `--save_model_as` (DreamBooth, fine tuning only)
You can select the model saving format from `ckpt, safetensors, diffusers, diffusers_safetensors`.
Specify it like `--save_model_as=safetensors`. If you load a Stable Diffusion model (ckpt or safetensors) and save it in Diffusers format, missing information will be filled in with information from Hugging Face, such as v1.5 or v2.1.
- `--huggingface_repo_id`, etc.
If huggingface_repo_id is specified, the model will be uploaded to HuggingFace at the same time. Be careful with the handling of the access token (refer to HuggingFace's documentation).
For example, specify as follows:
- `--huggingface_repo_id "your-hf-name/your-model" --huggingface_path_in_repo "path" --huggingface_repo_type model --huggingface_repo_visibility private --huggingface_token hf_YourAccessTokenHere`
If you specify `public` for huggingface_repo_visibility, the repository will be public. If you omit it or specify anything other than `public`, it will be private.
If you specify `--save_state`, specify `--save_state_to_huggingface` to save the state.
If you specify `--resume`, specify `--resume_from_huggingface` to download the state from HuggingFace and resume. The --resume option will be `--resume {repo_id}/{path_in_repo}:{revision}:{repo_type}`.
For example: `--resume_from_huggingface --resume your-hf-name/your-model/path/test-000002-state:main:model`
Specify `--async_upload` to upload asynchronously.
## Optimizer-related
- `--optimizer_type`
-- Specify the type of optimizer. The following can be specified.
- AdamW : [torch.optim.AdamW](https://pytorch.org/docs/stable/generated/torch.optim.AdamW.html)
- Same as when no option specified in past versions
- AdamW8bit : Same arguments as above
- PagedAdamW8bit : Same arguments as above
- Same as when `--use_8bit_adam` specified in past versions
- Lion : <https://github.com/lucidrains/lion-pytorch>
- Same as when `--use_lion_optimizer` specified in past versions
- Lion8bit : Same arguments as above
- PagedLion8bit : Same arguments as above
- SGDNesterov : [torch.optim.SGD](https://pytorch.org/docs/stable/generated/torch.optim.SGD.html), nesterov=True
- SGDNesterov8bit : Same arguments as above
- DAdaptation(DAdaptAdamPreprint) : <https://github.com/facebookresearch/dadaptation>
- DAdaptAdam : Same arguments as above
- DAdaptAdaGrad : Same arguments as above
- DAdaptAdan : Same arguments as above
- DAdaptAdanIP : Same arguments as above
- DAdaptLion : Same arguments as above
- DAdaptSGD : Same arguments as above
- Prodigy : <https://github.com/konstmish/prodigy>
- AdaFactor : [Transformers AdaFactor](https://huggingface.co/docs/transformers/main_classes/optimizer_schedules)
- Any optimizer
- `--learning_rate`
Specify the learning rate. The appropriate learning rate varies depending on the learning script, so please refer to the descriptions for each.
- `--lr_scheduler` / `--lr_warmup_steps` / `--lr_scheduler_num_cycles` / `--lr_scheduler_power`
Specifications related to the learning rate scheduler.
With the lr_scheduler option, you can select a learning rate scheduler from linear, cosine, cosine_with_restarts, polynomial, constant, constant_with_warmup, or any scheduler. The default is constant.
With lr_warmup_steps, you can specify the number of steps for the scheduler's warmup (gradually changing the learning rate).
lr_scheduler_num_cycles is the number of restarts for the cosine with restarts scheduler, and lr_scheduler_power is the polynomial power for the polynomial scheduler.
For more details, please refer to the scheduler's documentation.
If you use any scheduler, specify the options as arguments with `--scheduler_args` in the same way as for any optimizer.
### Specifying the Optimizer
To specify the arguments for the optimizer, use the `--optimizer_args` option. Specify the arguments in the format of `key=value`, and multiple values can be specified by separating them with commas. For example, to specify arguments for the AdamW optimizer, you would use `--optimizer_args weight_decay=0.01 betas=.9,.999`.
When specifying the arguments, please refer to the specifications of each optimizer.
Some optimizers require certain arguments, and if they are omitted, they will be automatically added (e.g., SGDNesterov's momentum). Check the console output for details.
The D-Adaptation optimizer adjusts the learning rate automatically. The value specified for the learning rate option is the rate of application of the learning rate determined by D-Adaptation, not the actual learning rate itself, so it is usually recommended to specify 1.0. If you want to specify half the learning rate for the text encoder and the full learning rate for the U-Net, you can specify `--text_encoder_lr=0.5 --unet_lr=1.0`.
The AdaFactor optimizer can adjust the learning rate automatically by specifying `relative_step=True` (which is added by default if omitted). To adjust the learning rate, the learning rate scheduler should be set to `adafactor_scheduler`. It is also recommended to specify `scale_parameter` and `warmup_init`.
The options for adjusting the learning rate are specified as `--optimizer_args "relative_step=True" "scale_parameter=True" "warmup_init=True"`.
If you do not want to adjust the learning rate, specify the argument `relative_step=False`. In this case, the learning rate scheduler should be set to `constant_with_warmup`, and it is recommended not to clip the gradient norm. The arguments would be `--optimizer_type=adafactor --optimizer_args "relative_step=False" --lr_scheduler="constant_with_warmup" --max_grad_norm=0.0`.
### Using Any Optimizer
To use an optimizer from `torch.optim`, specify only the class name (e.g., `--optimizer_type=RMSprop`). For other optimizers from other modules, specify the module name and class name separated by a period (e.g., `--optimizer_type=bitsandbytes.optim.lamb.LAMB`).
(Note: This is implemented using `importlib` internally, and the actual behavior is not confirmed. If necessary, please install the necessary package.)
<!--
## Training with arbitrary image size --resolution
You can train with non-square images. Specify the resolution as "448,640" for example, where "width,height". The width and height must be divisible by 64. Make sure the size of the training image and regularization image are the same.
Personally, I often generate vertical images, so I train with "448,640" and so on.
## Aspect Ratio Bucketing --enable_bucket / --min_bucket_reso / --max_bucket_reso
When you specify the enable_bucket option, it will be enabled. Stable Diffusion is trained at 512x512, but also learns at resolutions such as 256x768 and 384x640.
In this case, you do not need to unify the training image and regularization image to a specific resolution. You can select the optimal resolution from several resolutions (aspect ratios) and learn with that resolution.
The resolution is in units of 64 pixels, so the original image and aspect ratio may not match exactly, in which case the trimmed part is slightly trimmed.
You can specify the minimum size with the min_bucket_reso option and the maximum size with the max_bucket_reso option. The default is 256 and 1024 respectively.
For example, if you specify a minimum size of 384, resolutions such as 256x1024 or 320x768 will not be used.
If you increase the resolution to 768x768 or more, you may want to specify a maximum size of 1280 or so.
It may be beneficial to prepare various resolutions with similar trends to the training image for regularization images when enabling Aspect Ratio Bucketing.
(The images in a batch do not deviate significantly from the training image and regularization image, so it may not have a significant impact, but...)
## augmentation --color_aug / --flip_aug
Augmentation is a method to improve the model's performance by dynamically changing the data during training. It changes the color slightly with color_aug and flips left and right with flip_aug during training.
Since the data is dynamically changed, it cannot be specified with the cache_latents option at the same time.
## Training with fp16 gradients (experimental feature) --full_fp16
If you specify the full_fp16 option, the gradient will be changed from the usual float32 to float16 (fp16) during training (not mixed precision, but full fp16 training).
This allows you to train at 512x512 size with less than 8GB VRAM for SD1.x and less than 12GB VRAM for SD2.x.
Please specify fp16 in advance with accelerate config and specify ``mixed_precision="fp16"`` option (bf16 does not work).
To minimize memory usage, specify the xformers, use_8bit_adam, cache_latents, and gradient_checkpointing options, and set train_batch_size to 1.
(If you have the time, you can gradually increase the train_batch_size to slightly improve accuracy.)
I'm patching the PyTorch source to force it (confirmed with PyTorch 1.12.1 and 1.13.0). The accuracy will drop significantly, and the likelihood of training failure will also increase.
The learning rate and number of steps are also sensitive. Please be aware of these and use them at your own risk.
-->
# Creating Metadata Files
## Preparing Teacher Data
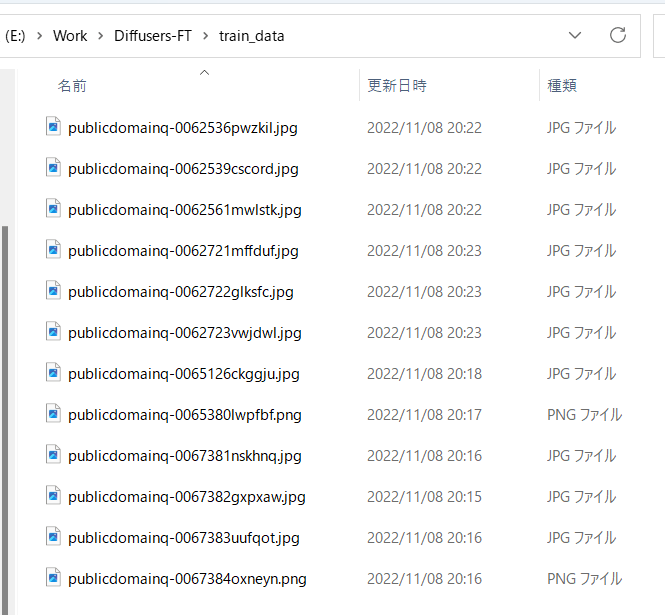
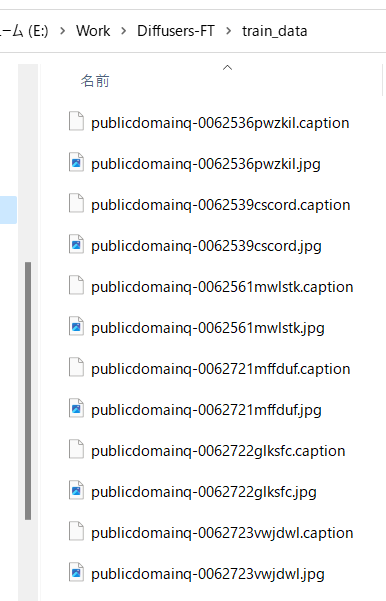
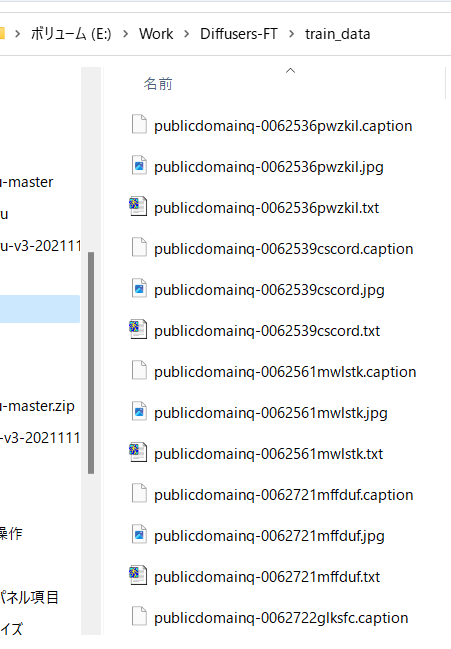
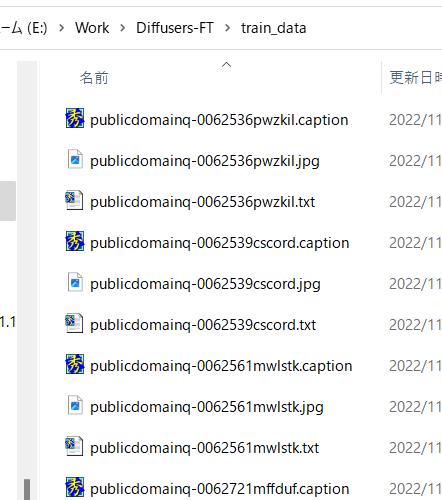
As described above, prepare the image data you want to learn and put it in any folder.
For example, you can store the images as follows:
## Automatic Captioning
If you want to learn only with tags without captions, skip this section.
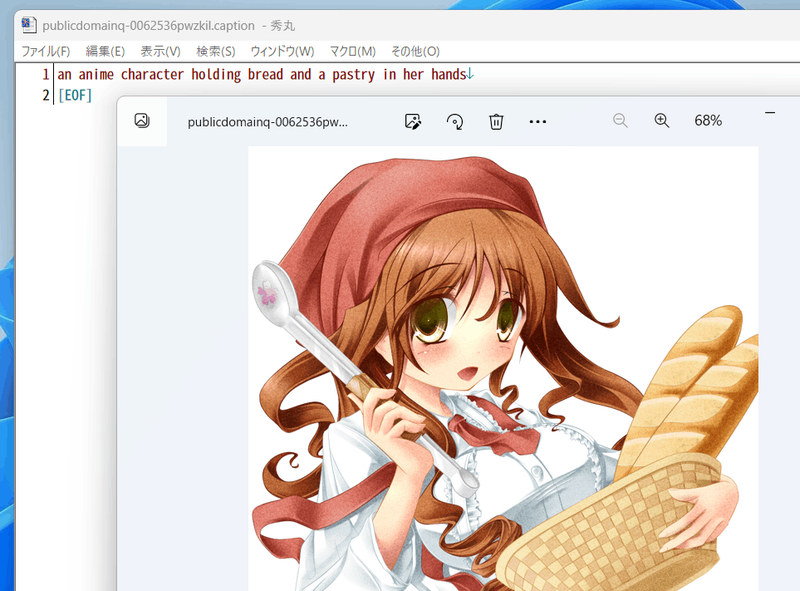
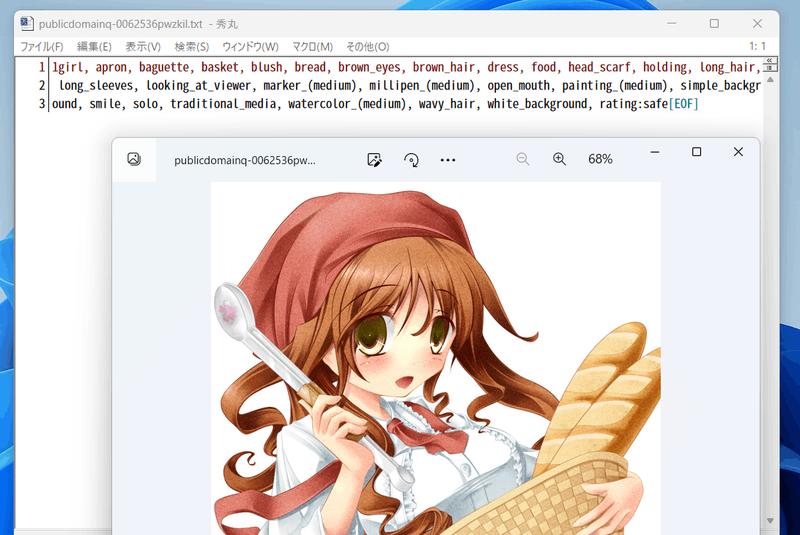
If you want to prepare captions manually, prepare the captions in the same directory as the teacher data images, with the same file name, but with the extension .caption, for example. Each file should be a single-line text file.
### Captioning with BLIP
With the latest version, you no longer need to download BLIP, download weights, or add a virtual environment. It should work as is.
Run make_captions.py in the finetune folder.
```
python finetune\make_captions.py --batch_size <batch_size> <teacher_data_folder>
```
If you put the teacher data in the parent folder's train_data, it would look like this:
```
python finetune\make_captions.py --batch_size 8 ..\train_data
```
Caption files are created in the same directory as the teacher data images, with the same file name, but with the extension .caption.
You can adjust the batch_size according to the capacity of your GPU's VRAM. Larger is faster (I think it can be increased even with VRAM 12GB).
You can specify the maximum length of the caption with the max_length option. The default is 75. If you want to increase it for models trained with token length 225, you can increase it.
You can change the extension of the caption with the caption_extension option. The default is .caption (if you change it to .txt, it will conflict with DeepDanbooru in the next section).
If there are multiple teacher data folders, run for each folder.
Note that inference has randomness, so the results will vary each time you run. To fix it, specify the random seed with the `--seed` option, such as `--seed 42`.
For other options, refer to the help with `--help` (the meanings of parameters are not well documented, so you need to refer to the source).
By default, caption files are generated with the extension .caption.
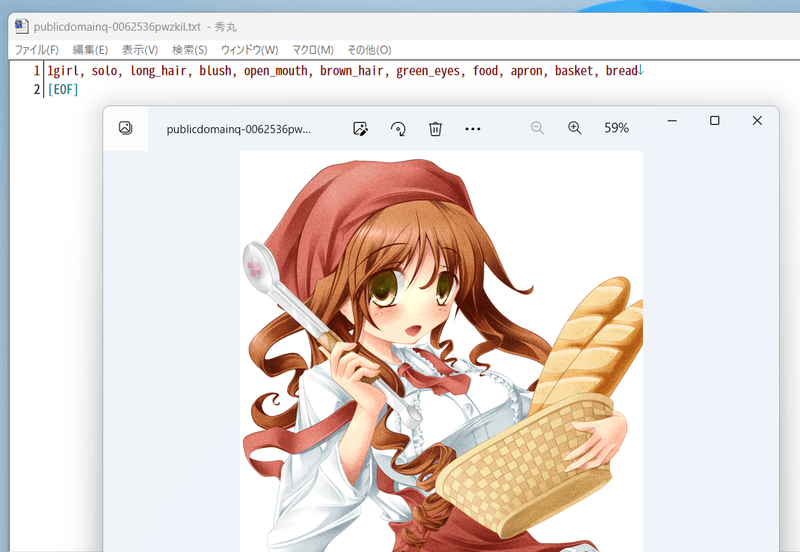
For example, the captions might look like this:
## Tagging with DeepDanbooru
If you do not want to tag with danbooru tags yourself, proceed to "Preprocessing Captions and Tag Information".
Tagging is done with DeepDanbooru or WD14Tagger. WD14Tagger seems to have higher accuracy. If you want to tag with WD14Tagger, proceed to the next section.
### Setting up the Environment
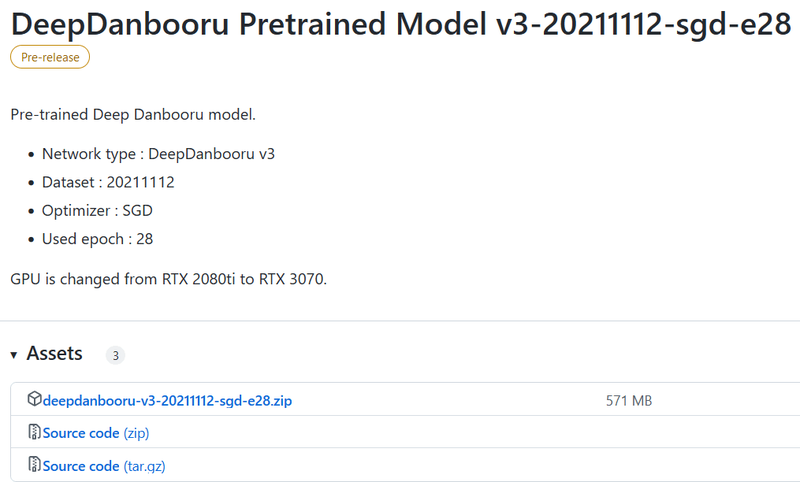
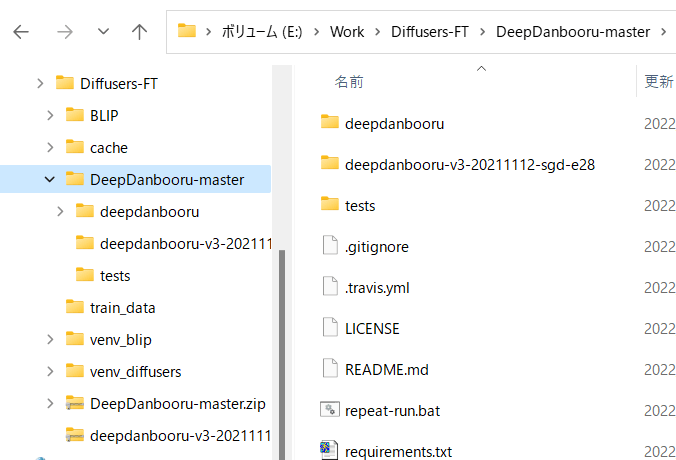
Clone DeepDanbooru <https://github.com/KichangKim/DeepDanbooru> into your working directory or download the zip and extract it. I extracted it.
Also, download deepdanbooru-v3-20211112-sgd-e28.zip from the Releases page <https://github.com/KichangKim/DeepDanbooru/releases> and extract it into the DeepDanbooru folder.
Download from the following page:
Set up the directory structure as follows:
Install the necessary libraries for the Diffusers environment. Move to the DeepDanbooru folder and install (I think it just adds tensorflow-io).
```
pip install -r requirements.txt
```
Next, install DeepDanbooru itself.
```
pip install .
```
With these steps, the tagging environment setup is complete.
### Tagging
Move to the DeepDanbooru folder and run deepdanbooru to tag.
```
deepdanbooru evaluate <teacher_data_folder> --project-path deepdanbooru-v3-20211112-sgd-e28 --allow-folder --save-txt
```
If you put the teacher data in the parent folder's train_data, it will look like this:
```
deepdanbooru evaluate ../train_data --project-path deepdanbooru-v3-20211112-sgd-e28 --allow-folder --save-txt
```
The tag file is created in the same directory as the teacher data image, with the same file name and extension .txt. It is processed one by one, so it is quite slow.
If there are multiple teacher data folders, please run for each folder.
The following will be generated:
The tags look like this (a lot of information...).
## Tagging with WD14Tagger
Steps to use WD14Tagger instead of DeepDanbooru.
We use the tagger used in Automatic1111's WebUI. Please refer to the information on the following github page (<https://github.com/toriato/stable-diffusion-webui-wd14-tagger#mrsmilingwolfs-model-aka-waifu-diffusion-14-tagger>).
The necessary modules for the initial setup are already installed. The weights are automatically downloaded from Hugging Face.
### Tagging
Run the script to tag.
```
python tag_images_by_wd14_tagger.py --batch_size <batch_size> <teacher_data_folder>
```
If you put the teacher data in the parent folder's train_data, it will look like this:
```
python tag_images_by_wd14_tagger.py --batch_size 4 ..\train_data
```
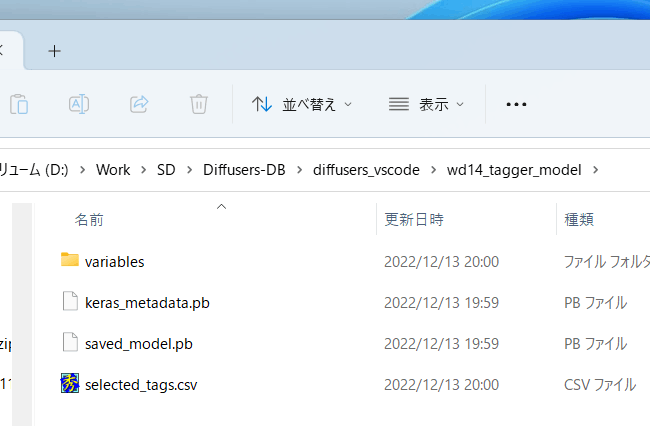
The model file is automatically downloaded to the wd14_tagger_model folder on the first run (you can specify the folder with the model_dir option).
The tag file is created in the same directory as the teacher data image, with the same file name and extension .txt.
The thresh option specifies the minimum confidence (probability) for a tag to be assigned. The default is the same as the WD14Tagger sample, 0.35. Lowering the value will increase the number of tags, but the accuracy will decrease.
The batch_size depends on the VRAM capacity of the GPU. Larger is faster (even if you can increase it a bit with a VRAM of 12GB). The caption_extension option allows you to change the extension of the tag file. The default is .txt.
The model_dir option allows you to specify the destination folder for the model.
The force_download option forces the model to be re-downloaded even if the destination folder already exists.
If there are multiple teacher data folders, please run for each folder.
## Preprocessing of captions and tag information
To make it easier to process from the script, we aggregate the captions and tags into one metadata file.
### Preprocessing of captions
To put the captions into the metadata, run the following in the working directory (if you don't use captions for learning, you don't need to run it) (actually, it's written in one line, as follows). The `--full_path` option stores the location of the image file in the metadata as a full path. If this option is omitted, the relative path is recorded, but the folder specification is required in the `.toml` file separately.
```
python merge_captions_to_metadata.py --full_path <teacher_data_folder>
--in_json <metadata_file_to_read> <metadata_file_to_write>
```
The metadata file name is arbitrary.
If the teacher data is train_data, there is no metadata file to read, and the metadata file to write is meta_cap.json, it will look like this:
```
python merge_captions_to_metadata.py --full_path train_data meta_cap.json
```
The caption_extension option allows you to specify the extension of the caption.
If there are multiple teacher data folders, specify the full_path argument and run for each folder.
```
python merge_captions_to_metadata.py --full_path
train_data1 meta_cap1.json
python merge_captions_to_metadata.py --full_path --in_json meta_cap1.json
train_data2 meta_cap2.json
```
If in_json is omitted, it will read from the existing metadata file and overwrite it.
__※If you specify in_json and write to a different metadata file each time, it is safer.__
### Preprocessing of tags
Similarly, we can also put the tags into the metadata (if you don't use tags for learning, you don't need to run it).
```
python merge_dd_tags_to_metadata.py --full_path <teacher_data_folder>
--in_json <metadata_file_to_read> <metadata_file_to_write>
```
If the same directory structure as before, read meta_cap.json and write to meta_cap_dd.json, it will look like this:
```
python merge_dd_tags_to_metadata.py --full_path train_data --in_json meta_cap.json meta_cap_dd.json
```
If there are multiple teacher data folders, specify the full_path argument and run for each folder.
```
python merge_dd_tags_to_metadata.py --full_path --in_json meta_cap2.json
train_data1 meta_cap_dd1.json
python merge_dd_tags_to_metadata.py --full_path --in_json meta_cap_dd1.json
train_data2 meta_cap_dd2.json
```
If in_json is omitted, it will read from the existing metadata file and overwrite it.
__※If you specify in_json and write to a different metadata file each time, it is safer.__
### Cleaning of captions and tags
So far, the metadata file has been assembled with captions and DeepDanbooru tags. However, the automatically captioned captions are slightly awkward (※), and the tags contain underscores and ratings, so (for DeepDanbooru) it is better to clean up the captions and tags using the editor's replace function.
※For example, if you are learning about anime girls, the captions may contain variations such as girl/girls/woman/women. Also, "anime girl" could be simply "girl".
A script is prepared for cleaning, so please edit the script contents according to the situation.
(No need to specify the teacher data folder. Clean all data in the metadata.)
```
python clean_captions_and_tags.py <metadata_file_to_read> <metadata_file_to_write>
```
--in_json is not specified, so please be careful. For example, it will look like this:
```
python clean_captions_and_tags.py meta_cap_dd.json meta_clean.json
```
So far, the preprocessing of captions and tags is complete.
## Pre-acquisition of latents
※ This step is not required. You can omit it and learn while acquiring latents.
Also, if you perform `random_crop` or `color_aug` during learning, latents cannot be acquired in advance (because the image is changed every time). If you do not acquire it in advance, you can learn with the metadata up to this point.
Pre-acquire the latent representations of the images and save them to the disk. This allows you to speed up the learning process. Also, perform bucketing (classify teacher data according to aspect ratio).
Enter the following in the working directory:
```
python prepare_buckets_latents.py --full_path <teacher_data_folder>
<metadata_file_to_read> <metadata_file_to_write>
<model_name_or_checkpoint>
--batch_size <batch_size>
--max_resolution <resolution width,height>
--mixed_precision <precision>
```
If the model is model.ckpt, the batch size is 4, the learning resolution is 512*512, the precision is no (float32), read the metadata from meta_clean.json and write to meta_lat.json, it will look like this:
```
python prepare_buckets_latents.py --full_path
train_data meta_clean.json meta_lat.json model.ckpt
--batch_size 4 --max_resolution 512,512 --mixed_precision no
```
The teacher data folder will save the latents in numpy's npz format.
You can specify the minimum resolution with the --min_bucket_reso option and the maximum resolution with the --max_bucket_reso option. The default is 256 and 1024, respectively. For example, if you specify a minimum resolution of 384, resolutions such as 256*1024 or 320*768 will not be used.
If you increase the resolution to 768*768 or larger, it is recommended to specify a maximum resolution of 1280 or higher.
Specify the --flip_aug option to perform augmentation (data expansion) of left-right flips. This can artificially double the amount of data, but if the data is not symmetrical on the left and right (for example, character appearance, hair type, etc.), it may not learn well.
(A simple implementation is to acquire latents for flipped images and save them to a file named *_flip.npz. There is no need to specify any options in fine_tune.py. If there is a file with _flip, it will randomly read either the flipped or non-flipped file.)
The batch size can be increased a little with VRAM 12GB.
The resolution must be a multiple of 64, specified as "width,height". The resolution is directly related to the memory size during fine tuning. With VRAM 12GB, 512,512 seems to be the limit (※). With 16GB, you can increase it to 512,704 or 512,768. However, with 256,256, it is said to be difficult with VRAM 8GB (parameters, optimizer, etc. require a certain amount of memory regardless of resolution).
※It has been reported that a batch size of 1 can run with 12GB VRAM at 640,640.
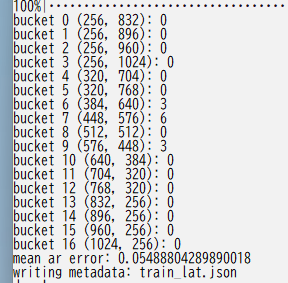
The following shows the results of bucketing.
If there are multiple teacher data folders, specify the full_path argument and run for each folder.
```
python prepare_buckets_latents.py --full_path
train_data1 meta_clean.json meta_lat1.json model.ckpt
--batch_size 4 --max_resolution 512,512 --mixed_precision no
python prepare_buckets_latents.py --full_path
train_data2 meta_lat1.json meta_lat2.json model.ckpt
--batch_size 4 --max_resolution 512,512 --mixed_precision no
```
It is also possible to read and write to the same file, but it is safer to use different files.
__※If you specify in_json and write to a different metadata file each time, it is safer.__
|