File size: 3,378 Bytes
319933a dcdd8fa 8aa5c27 dcdd8fa 8aa5c27 dcdd8fa 8aa5c27 dcdd8fa 8aa5c27 dcdd8fa 8aa5c27 dcdd8fa 8aa5c27 dcdd8fa 8aa5c27 dcdd8fa 8aa5c27 dcdd8fa 8aa5c27 dcdd8fa 8aa5c27 dcdd8fa 8aa5c27 dcdd8fa 8aa5c27 dcdd8fa 8aa5c27 dcdd8fa 8aa5c27 dcdd8fa 8aa5c27 dcdd8fa 8aa5c27 dcdd8fa 8aa5c27 dcdd8fa 8aa5c27 dcdd8fa 8aa5c27 |
1 2 3 4 5 6 7 8 9 10 11 12 13 14 15 16 17 18 19 20 21 22 23 24 25 26 27 28 29 30 31 32 33 34 35 36 37 38 39 40 41 42 43 44 45 46 47 48 49 50 51 52 53 54 55 56 57 58 59 60 61 62 63 64 65 66 67 68 69 70 71 72 73 74 75 76 77 78 79 80 81 82 83 84 85 86 87 88 89 90 91 92 93 94 95 96 97 98 99 100 101 102 103 104 105 106 107 108 109 110 111 112 113 114 115 116 117 118 119 120 121 122 123 124 125 126 127 128 129 130 |
---
slug: access-astra
title: Access Astra Board
authors: [asahu]
tags: [connect,access]
---
# Guide to access Astra Machina Dev Board
This tutorial will guide you through the steps required to access a Astra Machina Dev Board.
We can access our Astra Machina Board using:
**1. Using ADB on Host Machine**
**2. Using Tera Term / Putty on Host Machine**
**3. Using Wayland Terminal on Astra Board**
## 1. ADB
### Connect to your board
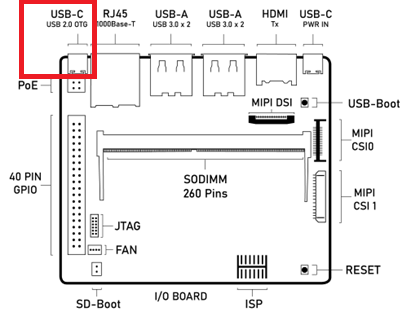
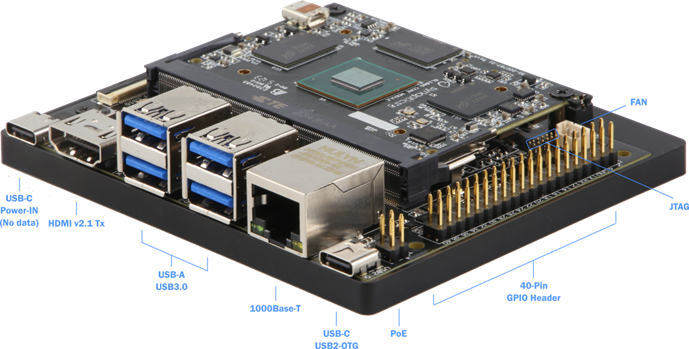
To communicate with your board via Android Debug Bridge (ADB) first connect a USB cable from your dev machine to the USB C port on the board marked "USB-2.0".

:::warning
The other USB-C marked PWR_IN should be connected to the power supply - make sure you get them the right way around!
:::
If you don't have ADB,it can be installed as part of [Android SDK Platform-Tools](https://developer.android.com/tools/releases/platform-tools#downloads). You should then be able to open a MacOS, Linux or Windows shell inside folder `platform-tools` and run:
```bash
adb devices
```
You can check if the Synaptics Astra board is attached:
<pre>List of devices attached
SL16x0 device</pre>
See the [user guide](https://synaptics-astra.github.io/doc/v/0.9.0/linux/index.html#the-shell-with-adb) for more information on ADB.
### Copy across the sample image
First, copy the example image from your dev machine to the board:
```
adb push ~/Downloads/expanse.jpg /home/weston/expanse.jpg
```
### Start a shell session
Then start a shell session:
```
adb shell
hostname
```
You should see the prompt has changed and the board responds with a hostname:
<pre>
sh-5.1# hostname
sl1680
</pre>
## 2. Tera Term / Putty
### Connect to your board
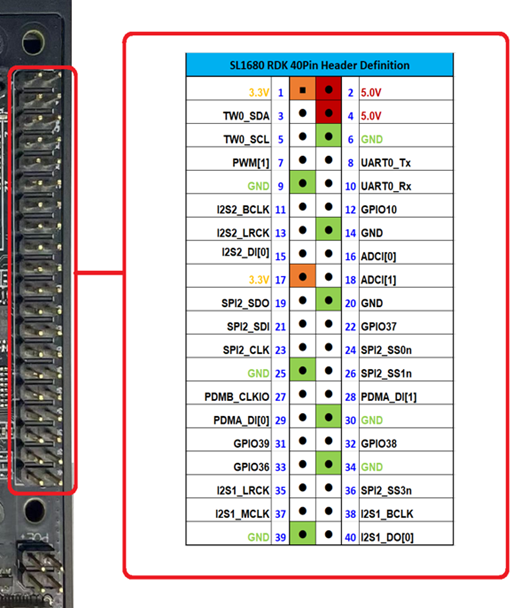
To communicate with your board via Tera Term or Putty first connect a **UART** from your dev machine to the GPIO Header of the board following this image:
**VDD -> Pin 1 , GND -> Pin 6 , TX -> Pin 8 and RX -> Pin 10**.

### Tera Term settings
Open Tera Term: New connection then Select Serial -> Port: 'COM$: Silicon Labs CP210x USB to UART Bridge'
Go to 'Setup' and Open 'Serial Port'
Then set 'Speed' -> '115200' and Click 'New Open'
### Copy across the sample image
Once in Tera Term is setup, Get the Inet address of your Astra Machina Board from here.
<!-- ```bash title="ADB_Terminal" class="no-copy-prompt"
sh-5.1# ifconfig eth0 | grep "inet addr" -->
```bash
ifconfig eth0 | grep "inet addr"
```
Copy the example image from your dev machine to the board using `scp ` to Machina board:
```bash
scp ~/Downloads/expanse.jpg [email protected]:/home/root
```
## 3. Wayland Terminal
### Connect to your board
Connect the Power supply in USB-C marked **PWR_IN**.
Astra Machina’s graphical desktop is enabled be default. It can be displayed on an external display connected to the HDMI port or a MIPI display.
Input can be provided by connecting a standard USB keyboard and mouse.

:::warning
HDMI is currently not supported on SL1620
:::
### Wayland Desktop
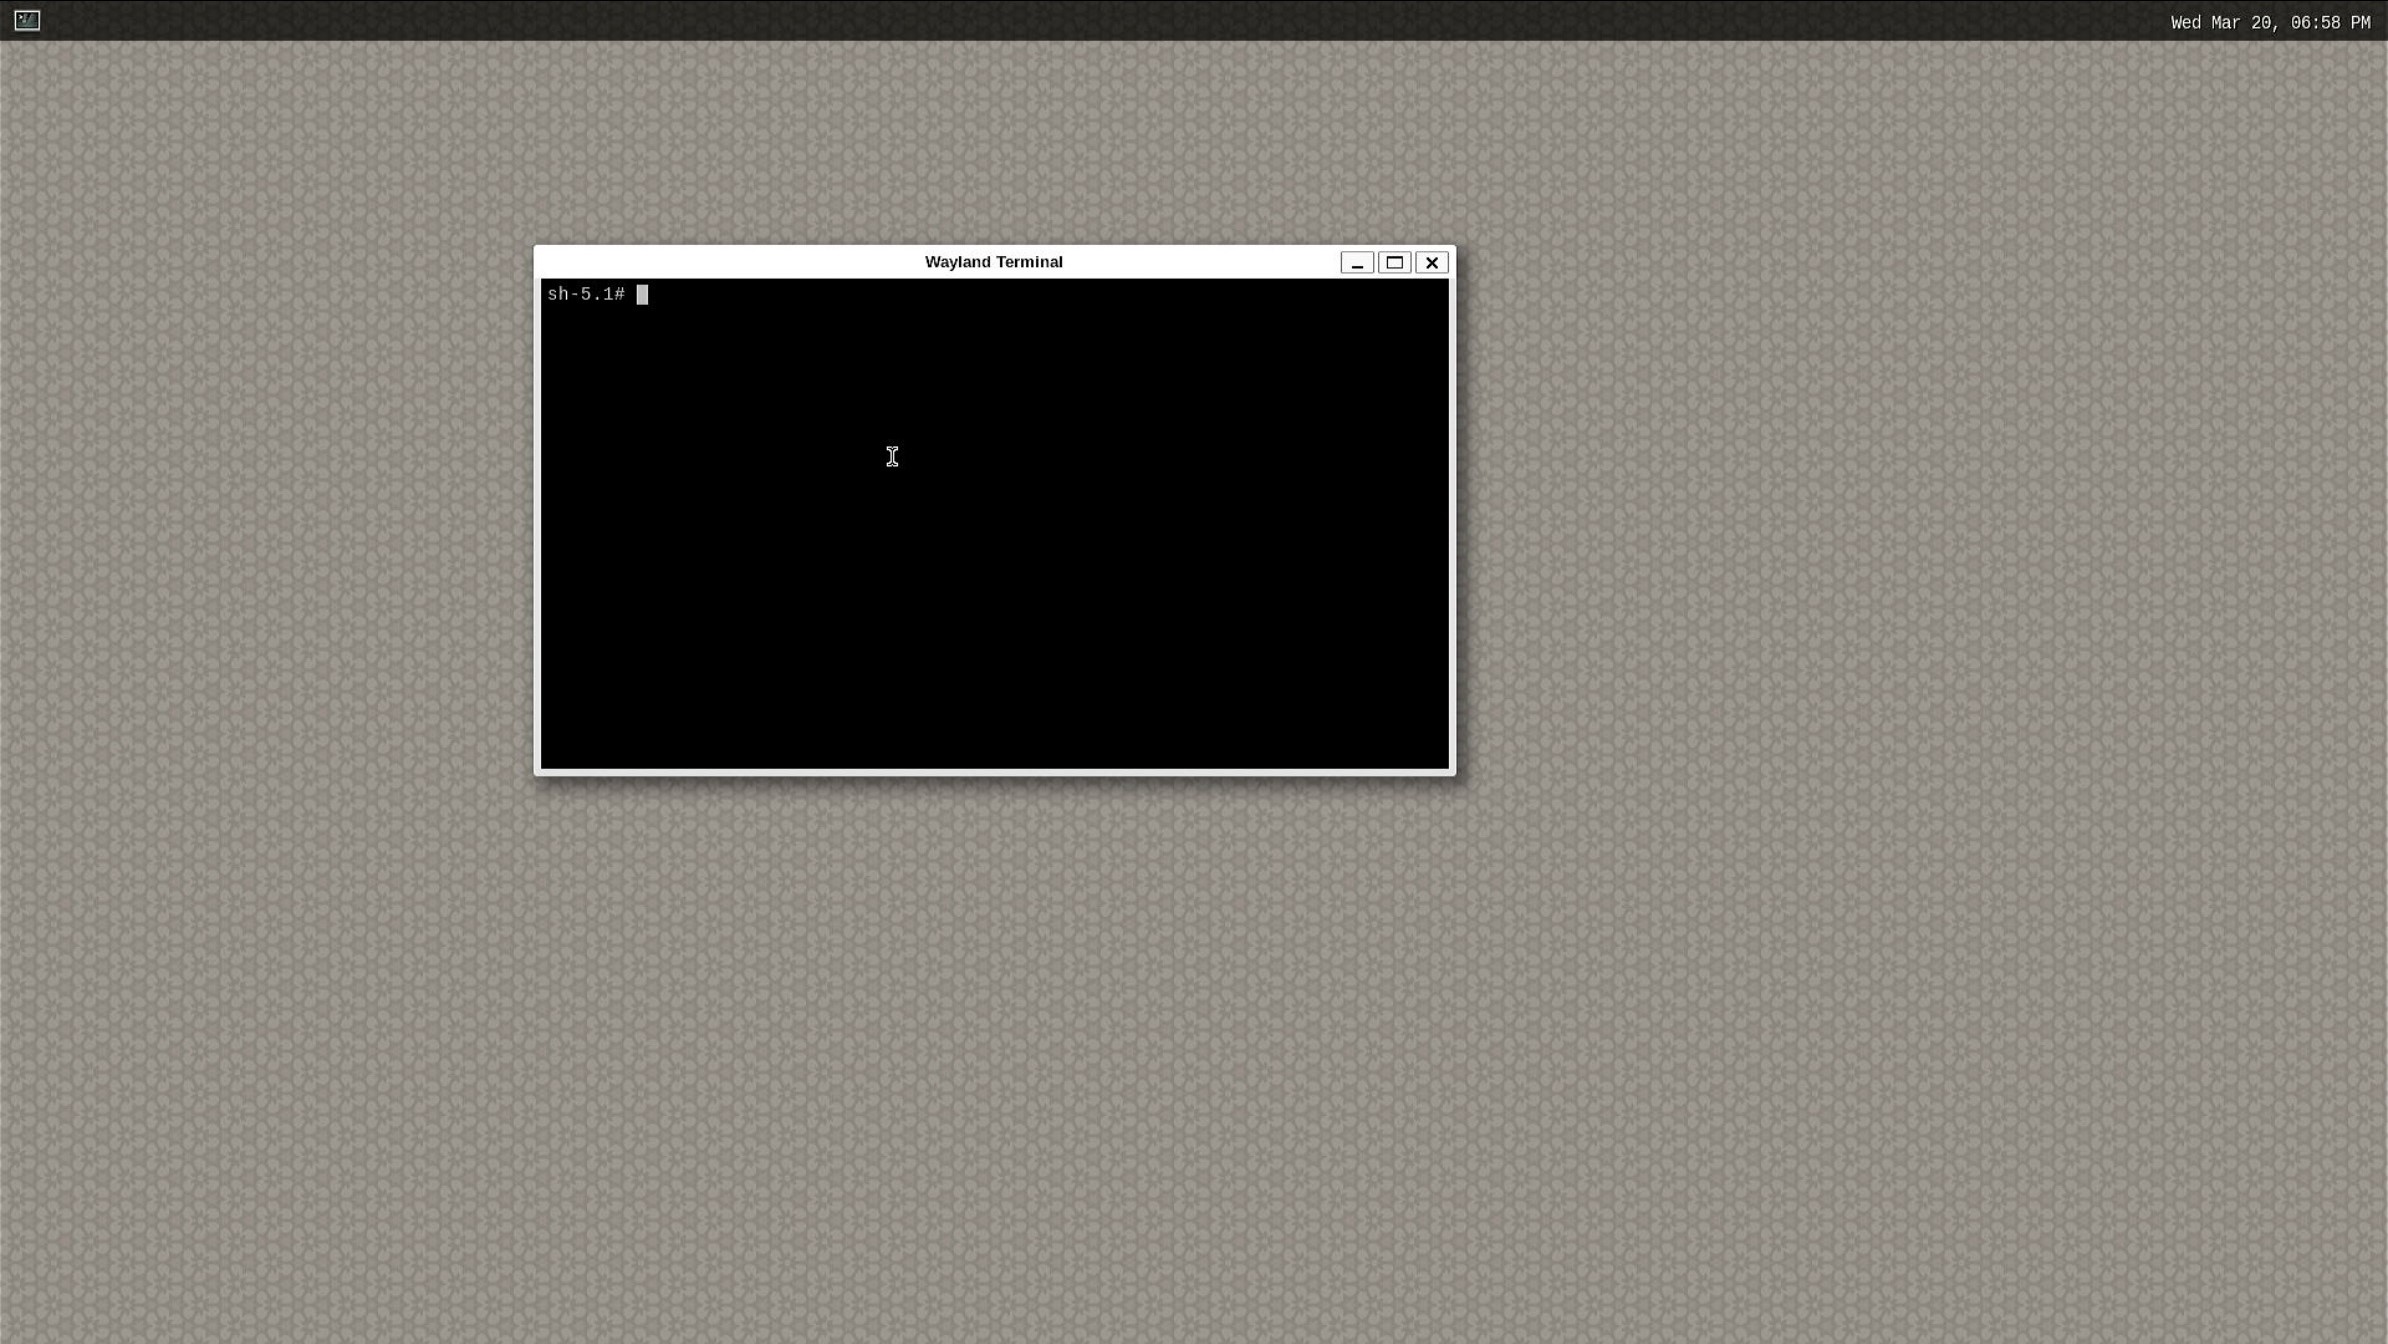
Clicking on the icon in the top left corner will open a terminal.

|